How to Make Aquarium Glass Structure at Home
Creating your own aquarium can be a rewarding and satisfying project. Not only can you customize it to your specific needs, but it can also be a cost-effective alternative to purchasing a pre-made tank. This guide will walk you through the steps to make your own aquarium glass structure at home.
Materials and Tools Needed
Before you begin, gather the following materials and tools:
a. Glass sheets (thickness depends on the size of the aquarium, typically 1/4″ for smaller tanks)
b. Aquarium-safe silicone sealant
c. Glass cutter
d. Sandpaper or a glass smoothing tool
e. Painter’s tape
f. Measuring tape or ruler
g. Protective gloves and goggles
h. Clamps (optional)

Step-by-Step Guide
1. Planning and Measuring
First, determine the dimensions of your aquarium. A standard beginner size is 10 gallons, with dimensions approximately 20″ x 10″ x 12″. Ensure that your glass sheets are cut to the correct dimensions: one bottom piece, two side pieces, and two front/back pieces.
Tip: When calculating the size of the glass pieces, remember that the side panels will fit inside the front and back panels.
2. Cutting the Glass
Using a glass cutter, carefully score the glass along the desired cutting lines. Apply consistent pressure and make a single, continuous score. Once scored, gently snap the glass along the scored line. Wear protective gloves and goggles to prevent injuries.
Tip: Practice scoring and snapping on a scrap piece of glass if you’re new to this process.
3. Smoothing the Edges
After cutting, the edges of the glass will be sharp and dangerous. Use sandpaper or a glass smoothing tool to smooth all edges. This step is crucial for safety and ensuring the silicone sealant adheres properly.
4. Dry Fitting the Pieces
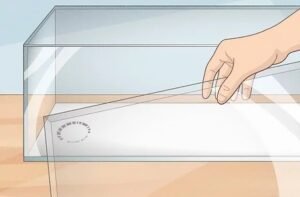
Assemble the glass pieces without any adhesive to ensure they fit together perfectly. Use painter’s tape to hold the pieces in place. This step allows you to make any necessary adjustments before final assembly.
5. Applying the Silicone Sealant
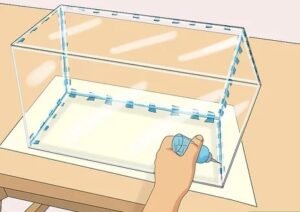
Apply a continuous bead of aquarium-safe silicone sealant along the edges of the bottom piece where the side panels will sit. Press the side panels into place, followed by the front and back panels. Ensure there is a generous amount of sealant in all seams to create a watertight seal.
Tip: Use a caulking gun for a smooth and even application of silicone.
6. Securing the Structure
Once all panels are in place, use painter’s tape to secure the joints tightly. If available, use clamps to hold the glass in place while the silicone cures. Make sure the aquarium is perfectly aligned and square.
7. Curing the Silicone
Allow the silicone sealant to cure completely. This typically takes 24-48 hours, but check the manufacturer’s instructions for exact curing times. Do not rush this process, as proper curing is essential for the strength and watertight integrity of your aquarium.
8. Testing for Leaks
After the silicone has cured, remove the tape and clamps. Fill the aquarium with water in a safe area where any leaks won’t cause damage. Let it sit for 24 hours to check for leaks. If any leaks are found, drain the aquarium and apply more silicone to the problematic areas.
9. Final Touches
Once your aquarium passes the leak test, drain it and clean the glass thoroughly. You can now proceed to set up your aquarium with substrate, decorations, water, and fish.
Tip: Consider adding a protective bottom layer, such as a piece of Styrofoam or foam board, to distribute weight evenly and protect the bottom glass panel.
 Building your own aquarium glass structure at home can be a fulfilling project that allows you to create a customized habitat for your aquatic pets. By following these steps and ensuring proper safety measures, you can construct a durable and leak-proof aquarium. Happy fish-keeping!
